🚀 Introduction
Many IoT and embedded devices, including single-board computers like Raspberry Pi, Radxa, and Orange Pi, use removable SD, CFast cards, or similar media for storing firmware, OS, and user data. It is desirable to make copies of these media devices before installing updates for backup purposes, or when a new copy of media is needed to be installed in another device.
This article will guide you through the process of working directly with physical disks and raw disk images on macOS from the console:
- 🔍 Listing physical disks
- ⚙️ Preparing for backup or restore operations
- 💾 Saving and restoring disk images
- ✅ Verifying disk images are properly saved or restored
- 📦 Optimizing space used by disk images
On macOS, diskutil and dd command-line utilities will be used to accomplish the above tasks.
diskutil is macOS’s built-in utility to manage local disks and volumes, while dd is a UNIX utility for working with files, including special device files that represent physical disks in the system.
⚠️ Special care should be taken when working with these utilities, as in most cases operations are irreversible. If used improperly, they can result in data damage or loss.
⚡ TL;DR
If you understand the risks and know what you are doing, you can use commands from this section to save and restore disk images.
If you are not sure or want to understand the details, proceed with the sections below.
💾 Save Disk to an Image File
- Identify disk:
Replace
diskutil list<X>indisk<X>and/dev/rdisk<X>below with the numeric identifier of the desired disk, and replace<disk-image-name>with the desired name of the disk image file. - Unmount volumes:
diskutil unmountDisk disk<X> - Save disk to a compressed image file:
sudo dd if=/dev/rdisk<X> bs=1M status=progress | xz --compress -2 --stdout --threads=0 > <disk-image-name>.img.xz - Prepare for device removal:
diskutil eject disk<X>
🔄 Restore Disk from an Image File
- Identify disk:
Replace
diskutil list<X>indisk<X>and/dev/rdisk<X>below with the numeric identifier of the desired disk, and replace<disk-image-name>with the name of the disk image file. - Unmount volumes:
diskutil unmountDisk disk<X> - Restore image from a compressed image file:
xz --decompress --stdout <disk-image-name>.img.xz | sudo dd of=/dev/rdisk<X> bs=1M status=progress - Prepare for device removal:
diskutil eject disk<X>
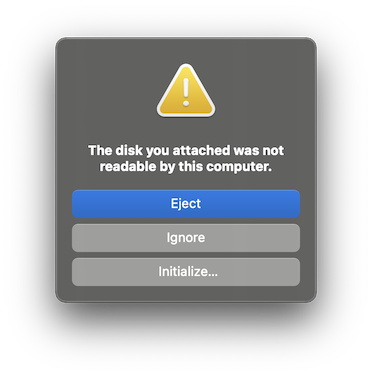
⚠️ macOS Unreadable Disk Warning Dialog
When attaching disks or inserting media that contain only partition types that are not supported by macOS, it will issue the warning dialog below.
It is safe to press the Ignore button and continue, or after writing the image to the disk, you can press Eject and skip ejecting
the disk from the console with the diskutil eject command.
🔍 Identify Physical Disk
The first and most important step is to list and identify the disk of interest using diskutil.
Note: Perform the steps below every time you turn on, restart, or wake up your computer, plug/unplug external devices, or insert/remove media, as disk identifiers and device nodes are volatile and may change between these events! Do not hard-code device identifiers in scripts!
diskutil list
This will list all the disks and their partitions that are currently connected to the computer. Stripped output:
/dev/disk0 (internal, physical):
   #:                       TYPE NAME                    SIZE       IDENTIFIER
   0:      GUID_partition_scheme                        *1.0 TB     disk0
   1:             Apple_APFS_ISC Container disk1         524.3 MB   disk0s1
   2:                 Apple_APFS Container disk3         994.7 GB   disk0s2
   3:        Apple_APFS_Recovery Container disk2         5.4 GB     disk0s3

/dev/disk3 (synthesized):
   ...

/dev/disk4 (internal, physical):
   #:                       TYPE NAME                    SIZE       IDENTIFIER
   0:     FDisk_partition_scheme                        *8.0 GB     disk4
   1:                      Linux                         8.0 GB     disk4s1

/dev/disk6 (external, physical):
   #:                       TYPE NAME                    SIZE       IDENTIFIER
   0:     FDisk_partition_scheme                        *16.0 GB    disk6
   1:                      Linux                         134.2 MB   disk6s1
   2:                      Linux                         536.9 MB   disk6s2
                    (free space)                         15.3 GB    -
Now, identify the disk of interest. Always skip disks that contain Apple partitions or are of synthesized type. In the example above, I have two external disks connected - an SD card inserted into the MacBook’s built-in SD card reader, and another - an external USB CFast reader. In the above output, they are listed as disk4 and disk6.
If unsure which one is which, use disk utility to get more information about the disks:
diskutil info disk4
Stripped output:
   Device Identifier:         disk4
   ...
   Device / Media Name:       Built In SDXC Reader
   ...
   Protocol:                  Secure Digital
   ...
   Disk Size:                 8.0 GB (7956594688 Bytes) (exactly 15540224 512-Byte-Units)
   ...
   Device Location:           Internal
   ...
diskutil info disk6
Stripped output:
   Device Identifier:         disk6
   ...
   Device / Media Name:       Transcend
   ...
   Protocol:                  USB
   ...
   Disk Size:                 16.0 GB (16013942784 Bytes) (exactly 31277232 512-Byte-Units)
   ...
   Device Location:           External
   ...
In the above listings, look for Device Identifier, Protocol, Disk Size, Device / Media Name, and Device Location fields to identify the device of interest.
In my case, disk4 is the built-in SD card reader with an 8.0 GB card, and disk6 is the USB CFast reader with a 16.0 GB card.
If unsure which disk corresponds to which physical device, try unplugging and removing unrelated devices from the system and performing the above steps again. If still unsure, stop here to avoid data loss.
In further steps, I will be performing operations on disk6.
⚙️ Prepare Disk for Direct IO Operations
Before performing any direct IO operations on the disk, all partitions and volumes should be unmounted! Unmounting will ensure that any pending write operations on the volume level are finished and the filesystem is in a consistent state.
diskutil unmountDisk disk6
Look for the output below. If you get an error, close user applications that might still be using volumes of the selected disk and try unmounting again. If no success - stop here to avoid data loss.
Unmount of all volumes on disk6 was successful
💾 Backup Disk to an Image File
Now it is time to use the dd utility.
The command below will copy the whole disk6 content (device file /dev/rdisk6) into cfast-disk.img file in the current directory, while reading and writing data in 1 MB chunks, and displaying progress information.
Please note that the r in /dev/rdisk6 is not a typo - this device file corresponds to the raw disk, and operations on this device are much faster than on /dev/disk6.
In most cases, the device block size is 512 bytes, but it is advised to perform read and write operations in larger chunks to improve I/O performance.
Don’t worry if the disk size is not a multiple of the selected buffer size - in our case, 1 MB, as dd will handle remainders properly.
Accessing the raw disk device file requires administrator privileges, hence sudo is used when invoking dd, which will ask you to grant permissions.
sudo dd if=/dev/rdisk6 of=cfast-disk.img bs=1M status=progress
Output:
  15972958208 bytes (16 GB, 15 GiB) transferred 72.004s, 222 MB/s
15272+1 records in
15272+1 records out
16013942784 bytes transferred in 74.675073 secs (214448304 bytes/sec)
🔄 Restore Disk from an Image File
To restore the image, just swap if (input file) and of (output file):
sudo dd if=cfast-disk.img of=/dev/rdisk6 bs=1M status=progress
Output:
  16002318336 bytes (16 GB, 15 GiB) transferred 308.004s, 52 MB/s
15272+1 records in
15272+1 records out
16013942784 bytes transferred in 308.249739 secs (51951197 bytes/sec)
Run eject disk to make sure all write operations are complete before unplugging the device or removing the media:
diskutil eject disk6
Wait for the output below:
Disk disk6 ejected
Now the device can be safely unplugged or the media removed from the reader.
📦 Optimize Space Used by Disk Images
When the disk image is saved as a regular file, it will take the same amount of space as the original disk size. In many cases, disks are not fully packed with useful data and may contain unallocated or empty spaces. Below are two methods to reduce the space taken by disk images.
🕳️ Use of Sparse Files
Sparse files are special files that hold only non-zero data and metadata about empty areas (holes) in the file. This makes them very efficient for disk images that have large amounts of empty space.
The command below will create a sparse disk image file. It will read data in 1 MB chunks and write in 512 bytes chunks, marking any 512 bytes chunks filled with zeroes as being empty, i.e., “holes”.
sudo dd if=/dev/rdisk6 of=cfast-disk-sparse.img ibs=1M obs=512 conv=sparse status=progress
Output:
  15890120704 bytes (16 GB, 15 GiB) transferred 71.002s, 224 MB/s
15272+1 records in
31277232+0 records out
16013942784 bytes transferred in 71.548794 secs (223818487 bytes/sec)
Check the resulting file sizes using ls:
ls -al cfast-disk.img cfast-disk-sparse.img
ls shows file sizes taking into account sparse file “holes”, hence both files appear as having the same size:
-rw-r--r--  1 root  staff  16013942784 May  4 13:56 cfast-disk-sparse.img
-rw-r--r--  1 root  staff  16013942784 May  4 12:34 cfast-disk.img
Now compare the actual space used by sparse and regular disk images using the du utility:
du -hs cfast-disk.img cfast-disk-sparse.img
In my case, the sparse disk image uses less than 2% of the total disk size! And that is expected - if you look at the output of diskutil list above,
disk6 contains two partitions of 134.2 MB and 536.9 MB, which, I also know, are not fully taken.
 15G	cfast-disk.img
282M	cfast-disk-sparse.img
To verify that the content of files is equal, SHA1 hash calculation can be used:
sha1sum cfast-disk.img cfast-disk-sparse.img
7a7d26c342dc44d9e814de00d1de8a6d2b26e17e  cfast-disk.img
7a7d26c342dc44d9e814de00d1de8a6d2b26e17e  cfast-disk-sparse.img
Note on copying sparse files: not all filesystems and file copying utilities preserve sparse files and might replace “holes” with zeroes.
Generally, the second method of using compressed disk images is more preferred over this one, as it produces even smaller disk image files with negligible performance drop when saving and restoring images. And these files can be safely copied across different systems without worrying about sparse file support.
🗜️ Compress Disk Images
I prefer xz-compressed images since they provide great performance in terms of compression ratio and decompression speed.
sudo dd if=/dev/rdisk6 bs=1M status=progress | xz --compress -2 --stdout --threads=0 > cfast-disk.img.xz
  15922626560 bytes (16 GB, 15 GiB) transferred 73.004s, 218 MB/s
15272+1 records in
15268+9 records out
16013942784 bytes transferred in 73.422991 secs (218105291 bytes/sec)
In this particular case, the output image size was only 80 MB. And the read + compression speed reached 218 MB/s, which is comparable to 224 MB/s when no compression was used.
To uncompress:
xz --decompress --stdout cfast-disk.img.xz | sudo dd of=/dev/rdisk6 bs=1M status=progress
On a side note - by default, xz produces sparse uncompressed files. Moreover, xz-uncompressed files take even less space compared to ones
produced by dd, since dd operates on fixed block boundaries, while xz looks for continuous empty regions in uncompressed data.
This was verified with:
xz --decompress cfast-disk.img.xz --stdout > cfast-disk-unxz.img
du -sh cfast-disk-sparse.img cfast-disk-unxz.img
282M	cfast-disk-sparse.img
272M	cfast-disk-unxz.img
✅ Verify Disk Image
To ensure the integrity of your disk images, you can calculate and verify SHA1 hashes at different stages of the process.
Creating and Verifying Disk Image
When creating a disk image, you can calculate its SHA1 hash while writing it to a file using process substitution:
sudo dd if=/dev/rdisk6 bs=1M status=progress | tee >(sha1sum) | xz --compress -2 --stdout --threads=0 > cfast-disk.img.xz
This command will:
- Read from the disk using
dd - Split the output using
tee:- One stream goes to
sha1sumfor hash calculation - Another stream goes to
xzfor compression
- One stream goes to
- Save the compressed output to
cfast-disk.img.xz
The output will look like:
  16002318336 bytes (16 GB, 15 GiB) transferred 79.003s, 203 MB/s
15272+1 records in
15263+19 records out
16013942784 bytes transferred in 79.060099 secs (202554044 bytes/sec)
7a7d26c342dc44d9e814de00d1de8a6d2b26e17e  -
Note: The difference in record counts (15272+1 records in vs 15263+19 records out) is normal and occurs because:
ddreads data in 1MB blocks (as specified bybs=1M)- When the data is piped through multiple commands (
tee,xz), the blocks might be split or combined differently - The total number of bytes transferred remains the same (16013942784 bytes)
- The
+1and+19indicate partial blocks at the end of the transfer
This difference doesn’t affect data integrity, as the SHA1 hash verifies the actual content.
Save the hash value (7a7d26c342dc44d9e814de00d1de8a6d2b26e17e) for later verification.
Verifying Restored Disk Image
To verify that the disk image was correctly written to a disk, you can calculate the hash of the target disk and compare it with the original:
sudo dd if=/dev/rdisk6 bs=1M status=progress | sha1sum
If the hash matches the one you saved earlier, the disk image was written correctly.
⚠️ This is only true when the image file size exactly matches the target disk size. If the physical disk is larger, the hash calculation will include data from the area after the disk image, resulting in a mismatched hash.
To overcome this limitation, we need to specify the exact size of the image when calculating the hash. However, the macOS version of dd only allows limiting data to read by an integer number of blocks.
My disk image size is not evenly divisible by 1 MB, also using a block size of 512 bytes is impractical as it would result in very slow disk read operations.
Instead, still very impractical, I calculated that my image consists of 20686 blocks of 774144 bytes each,
and with below command I have verified that image was successfully written on the disk of a larger size.
sudo dd if=/dev/rdisk6 bs=774144 count=20686 status=progress | sha1sum
Verifying Compressed Disk Image
To verify the integrity of a compressed disk image without decompressing it to a file:
xz --decompress --stdout cfast-disk.img.xz | sha1sum
This will decompress the image in memory and calculate its hash, which should match the original hash.
🎯 Conclusion
macOS provides powerful command-line utilities for working with disk images, making it possible to create reliable backups of removable media and restore them when needed. The combination of diskutil and dd offers a robust solution for disk imaging tasks, while tools like xz compression and sparse files help optimize storage space.
Key takeaways from this guide:
- 🔍 Always identify the correct disk using
diskutil listanddiskutil infobefore performing any operations - ⚙️ Unmount all volumes before working with raw disk devices
- 💾 Use
/dev/rdiskXfor faster raw disk access - 📦 Consider using compression to save storage space
- ✅ Always verify disk images using checksums
- ⏏️ Eject disks properly after operations are complete
Remember that working with raw disk devices requires administrator privileges and carries risks of data loss if not done carefully. Always double-check disk identifiers and ensure you’re working with the correct device before proceeding with any operations.
With these tools and precautions in mind, you can confidently create and restore disk images for your IoT devices, embedded systems, and other removable media.